November 28, 2013

Little Tote Tutorial . . .

Today I'm sharing the tutorial for a little tote I've made many times over the past couple years.  It makes a quick gift, and is the perfect size for a Bible & Psalter Book for church.


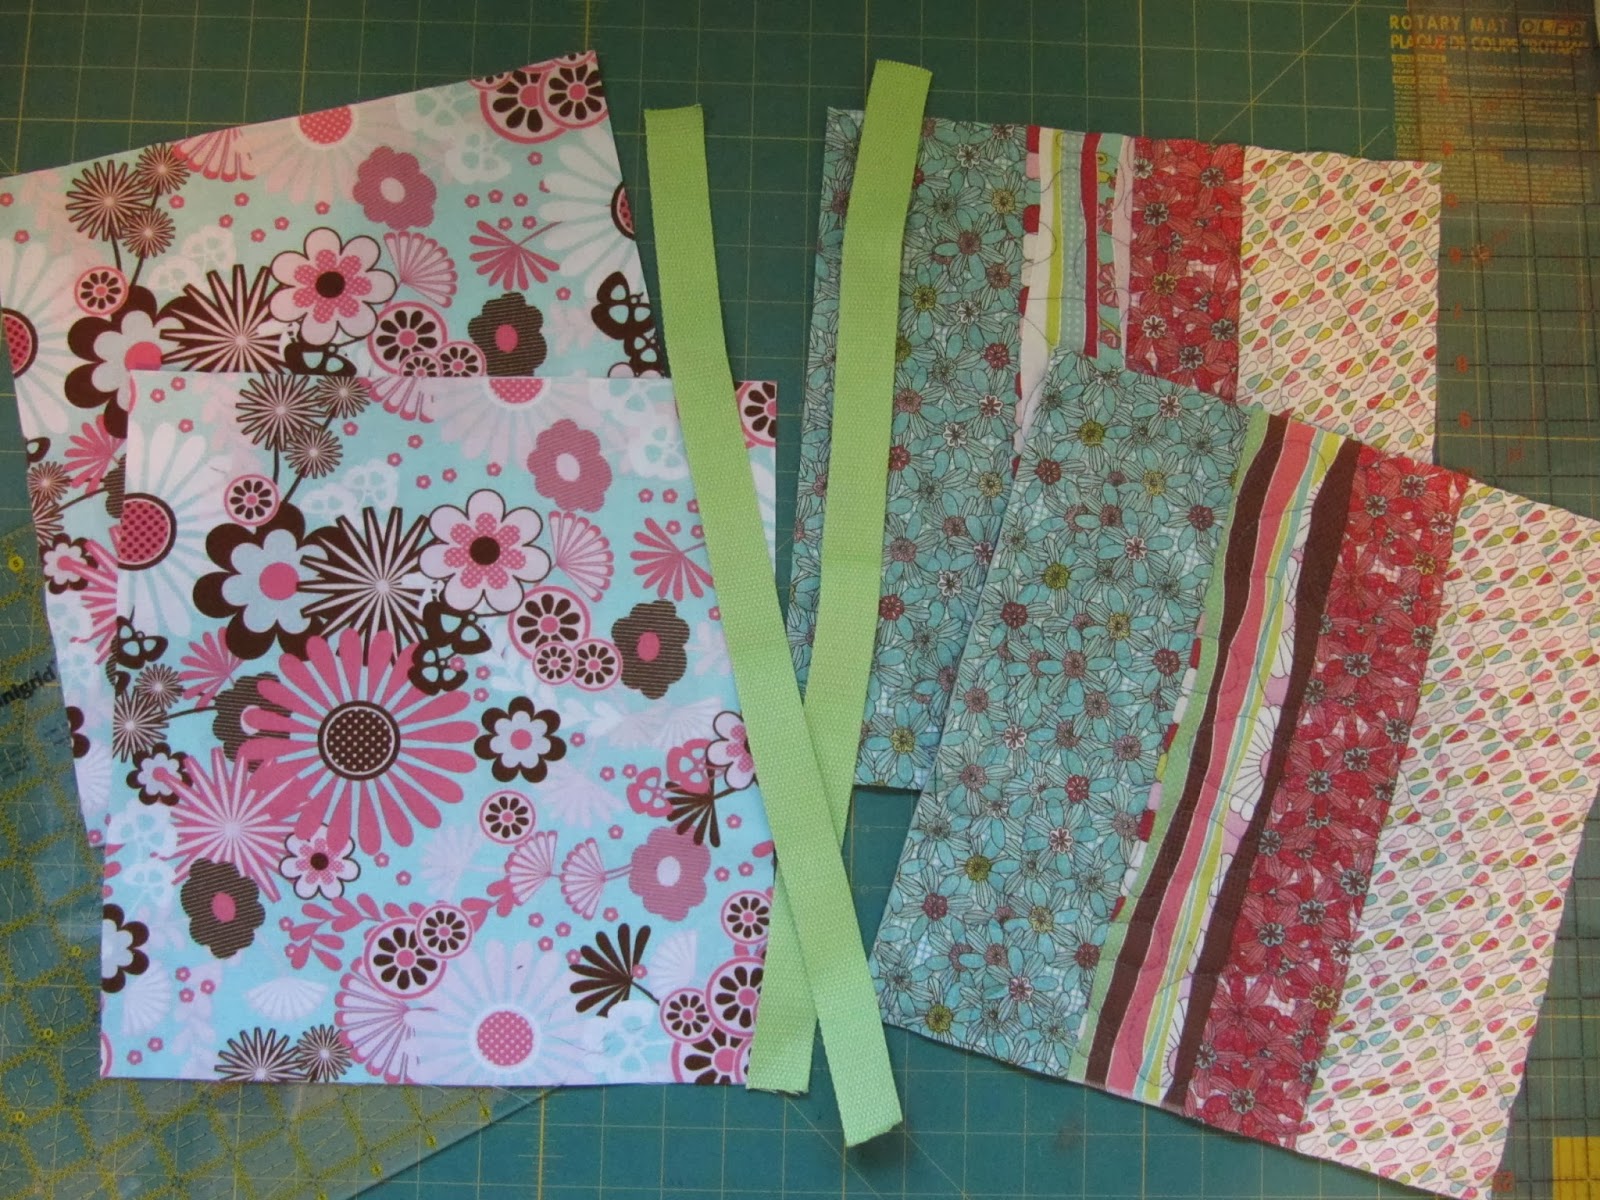
First, cut out your fabric. You will need two pieces 11" (width) x 12" (height) of your exterior fabric, lining, and fusible fleece (or if you prefer to quilt your exterior pieces - cut your exterior, batting and scrap fabric to 12" x 13", quilt the layers together, and then trim to 11" x 12"). You will also need two straps about 18" in length each - you can choose to make them out of fabric or use pre-made.  The ones I used are from Wholeport.com and can be found here.

Iron the fusible fleece to the back of your exterior pieces (unless you have already quilted your exterior pieces). Find the top center of an exterior piece, and pin strap 4" apart. Sew strap close to top edge. Repeat with second exterior piece and strap.

Pin exterior pieces right-side together and stitch with a 1/2" seam allowance. Make sure you don't catch your straps in the stitching.

Now it's time to make the bottom corners. Line up the side and bottom seam and pin. Using a ruler, find the spot where the corner is 3" in width and draw a line with a pen. Using a small stitch length, stitch on this line. Cut off excess corner fabric.

Repeat above steps with lining pieces - but when sewing right-sides together, leave a 4" opening on bottom to turn bag through later. Sew bottom corners same as above.

Turn the exterior of bag right-side out and place inside of lining. Pin the two together.

Sew along upper edge with a 1/2" seam allowance. Do a double-stitch over handles.

Gently pull bag right-side out through opening in lining. Check your seam for any puckers or loose threads.

Pin and sew the opening in the lining.


 Push lining into bag, making sure to push out corners. Carefully iron the top edge of bag.

Top-stitch the upper edge of bag. And you're done!

Here are some variations I've made with the same measurements. 

And for a couple boy versions over the years, I changed the bag dimensions to 12.5" x 9.5" and shortened the straps to 10".

Please let me know if you enjoyed this tutorial, or if there's anything unclear in the directions. 
Thanks for stopping by!

November 27, 2013

sewing with stretch lace . . .


Sometimes I bring my daughters to the fabric store and let them pick out fabric for dresses or tops . . . and sometimes I walk out with a challenge. My oldest daughter picked out a cotton for a new dress and a stretch lace for the sleeves. I ended up going with a fitted dress pattern, and cutting the sleeves narrower, and then crossed my fingers. I just had to take in the sleeves a bit to make them a big narrower, but otherwise it turned out to be a good fit.


Now I've been putting off the next challenge for her . . . a lined fuzzy chenille bathrobe. Wish me luck!

November 21, 2013

winner and back to sewing for the girls . . .

The winner of the three Peek-a-Boo Patterns was Mary Ann!  She managed to pick her patterns from their huge selection and went with the v-neck cardigan, skinny jeans, and boxers/briefs.  Looks like some fun boy sewing in her future!


And after all that sewing for my boy, I'm back to sewing for my girls.  A dress just about finished, a Breeann shirt for each girl, and a pink fuzzy bathrobe are on the list.  Hoping my sore neck and shoulders get better soon so I can get them done!


November 13, 2013

For the Boys blog hop with a giveaway. . .

Today I'm participating in the For the Boys blog hop over at Sew We Quilt . . .

I've dedicated my sewing time to my little guy all this past week and made him a Classic Oxford short sleeve shirt, a bathrobe, and a backpack with matching lunchbag. You can check back on my past posts if you'd like to see more pictures or info about any of them.


And today I have the long-sleeve version of the Classic Oxford shirt (pattern from Peekaboo Patterns) and some matching ties to go with it (tie tutorial found here).


Seriously, is there anything cuter than a little man all dressed up?!


Peekaboo Patterns is offering a giveaway to one of my readers - use the rafflecopter below to win three patterns of your choice from their shop (over a hundred patterns to choose from!).


And for you chance to win a fat quarter stack from the blog hop host, just leave a comment below.  And to increase your chances, visit the other blogs on the hop today:

November 12, 2013

robot backpack and lunchbag . . .


Another sew for my little guy this week - a new backpack and lunchbag.
 

These Robot Factory prints from Robert Kaufman are so fun, and I picked up a basic backpack pattern for a $1 at my local fabric store.


I made a couple changes to the pattern - I wanted a big front pocket with a velcro flap for his gym clothes, and I wanted the straps to be adjustable.  I used a free online tutorial for the lunchbag, but tweaked it a bit.


The inside fabric is Kona Flame, and there's a divided pocket for some of his treasures.


Linking up to Purse Palooza.  And Thursday is my day in the For the Boy Blog Hop - one more boy project to finish up this week!

more sewing for the little man . . .


This past week, I've been spending all my sewing time on items for my little guy. Here's the second item I've completed - a new bath robe.


He had outgrown his old one, and wasn't really interested in his sister's purple hand-me-down.  I used a $1 pattern from the clearance bin at my local fabric store, and the fabric was given to me by my mother-in-law.


He loves how cozy it is, and there's lots of room to grow so it should last a few years.


I just finished off a couple more items for him, so there will be more handmade boy items being blogged about this week.  And Thursday is my day in the For the Boys Blog hop, so check back for your chance at some giveaway prizes.

November 08, 2013

Sewing for the boy . . .


I'm joining in the For the Boys Blog Hop over at Sew Incredibly Crazy that's going on right now.  My day isn't until the 14th, but I've decided to dedicate all my sewing room time to my little guy this week, and share some boy sewing over a few blog posts.  The first on my list was trying out the Classic Oxford shirt from Peek-a-Boo Patterns.  The fabric I used is from Joel Dewberry.


I went simple for my first try at this pattern, and chose the short sleeve option and snaps for buttons.  I love all the details - the pleat in the back, front pocket, back yoke, and how nice and sturdy the collar is. My little guy loves it too, and it fits him perfect.  I have plans to make a long-sleeve version with cuffs and convertible sleeves next.


So check back with me next week for some more boy sewing, and a giveaway on my day to host!

November 04, 2013

A new bag for me!


I cut out two complete sets of pattern pieces for this bag quite some time ago.  I made one with a snap-closure option, and then gave it away.  The other set was forgotten about, until last week I came across it in my craft room.  So I got to work sewing it up, and I'm so happy with my finished bag!


The pattern is called Steph in the City and it's from Emmaline Bags.  Her instructions are really well written - she made the interior zippered pocket and top-zip closure really easy to make.  The adjustable strap is great for cross-body or on-the-shoulder wearing, and I added a swivel clasp for my keys.  The fabric is from Wholeport.com - prints can be found here and here.


Linking up to the Purse Palooza at Sew Sweetness:

November 02, 2013

Bloggers Quilt Festival: Please VOTE!

I've entered two quilts in the bloggers quilt festival and voting is now open.  There are some fabulous prizes up for grabs, so if you like my quilts, please vote for me!  You can vote once in each category.

My baby quilt can be found here (#41):

 My Group Bee quilt can be found here (#20):

And my friend Alisa submitted a gorgeous quilt in the Throw Quilt Category here (#56):